프로젝트 세팅
gradle dependency
plugins {
    id 'java'
    id 'org.springframework.boot' version '2.7.13'
    id 'io.spring.dependency-management' version '1.0.15.RELEASE'
}

group = 'com.example'
version = '0.0.1-SNAPSHOT'

java {
    sourceCompatibility = '11'
}

configurations {
    compileOnly {
        extendsFrom annotationProcessor
    }
}

repositories {
    mavenCentral()
}

dependencies {
    implementation 'org.springframework.boot:spring-boot-starter-batch'
    implementation 'org.springframework.boot:spring-boot-starter-data-jdbc'
    implementation 'org.springframework.boot:spring-boot-starter-data-jpa'
    compileOnly 'org.projectlombok:lombok'
    developmentOnly 'org.springframework.boot:spring-boot-devtools'
    annotationProcessor 'org.projectlombok:lombok'
    runtimeOnly 'com.mysql:mysql-connector-j'
    testImplementation 'org.springframework.boot:spring-boot-starter-test'
    testImplementation 'org.springframework.batch:spring-batch-test'
}

tasks.named('test') {
    useJUnitPlatform()
}
docker-compose.yml 파일 작성
version: '3'

services:
  mysql:
    container_name: mysql_house
    image: mysql/mysql-server:5.7
    environment:
      MYSQL_ROOT_HOST: '%'
      MYSQL_USER: "house"
      MYSQL_PASSWORD: "house"
      MYSQL_DATABASE: "house"
    ports:
      - "3318:3306"
    command:
      - "mysqld"
      - "--character-set-server=utf8mb4"
      - "--collation-server=utf8mb4_unicode_ci"
application.yml 파일 작성
spring:
  profiles:
    active: local
  batch:
    job:
      names: ${job.name:NONE}

---
spring:
  config:
    activate:
      on-profile: local
  datasource:
    url: jdbc:mysql://127.0.0.1:3318/house
    driver-class-name: com.mysql.cj.jdbc.Driver
    username: house
    password: house
  jpa:
    show-sql: true
    generate-ddl: false
    hibernate:
      ddl-auto: none
  batch:
    jdbc:
      initialize-schema: ALWAYS

---
spring:
  config:
    activate:
      on-profile: test
  jpa:
    database: h2
배치 잡을 위한 애노테이션 작성
@EnableBatchProcessing
@SpringBootApplication
public class SpringBatchPracticeApplication {

   public static void main(String[] args) {
      SpringApplication.run(SpringBatchPracticeApplication.class, args);
   }

}
프로그램을 실행시켜 보면 실행이 되었다가 종료되는 것을 확인할 수 있다. 배치 프로그램의 경우 계속 돌아가는 것이 아니라 완료 후 종료가 된다.
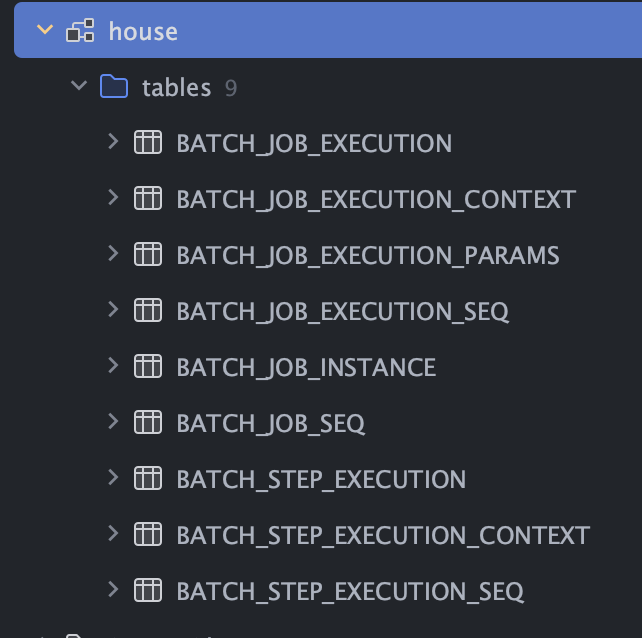
이후 데이터베이스 테이블이 생성된 것을 확인할 수 있다.
다음과 같이 간단한 Tasklet 스텝 기반의 배치 코드를 작성해보자.
@Configuration
@RequiredArgsConstructor
public class HelloJobConfig {

   private final JobBuilderFactory jobBuilderFactory;
   private final StepBuilderFactory stepBuilderFactory;

   @Bean("helloJob")
   public Job helloJob(Step step) {
      return jobBuilderFactory.get("helloJob")
         .incrementer(new RunIdIncrementer())
         .start(step)
         .build();
   }

   @JobScope
   @Bean("helloStep")
   public Step helloStep(Tasklet tasklet) {
      return stepBuilderFactory.get("helloStep")
         .tasklet(tasklet)
         .build();
   }

   @StepScope
   @Bean
   public Tasklet tasklet() {
      return ((contribution, chunkContext) -> {
         System.out.println("hello Spring batch");
         return RepeatStatus.FINISHED;
      });
   }
}
Intellij 설정을 통해 프로그램 실행시 만든 job을 실행하도록 설정해준다.

Job 실행이 된 것을 확인할 수 있다.

배치 스키마를 통해 실행 내역을 확인할 수 있다.
BATCH_JOB_EXECUTION을 보면 다음과 같이 실행 로그가 찍혀있다.

Spring Batch 실행 환경
배치 프로그램을 Build하고 jar를 통해 실행하는 실습을 진행해보자.
먼저 프로젝트를 빌드한다.
./gradlew bootJar
빌드한 파일을 실행해보자.
java -jar build/libs/spring-batch-practice-0.0.1-SNAPSHOT.jar --spring.batch.job.names=helloJob
Tasklet 내부에서 의도했던 로직이 돌아간 것을 볼 수 있다.

이처럼 build 파일을 실행해서 배치를 돌릴 수 있다. 이 때 다음과 같은 방법을 고려한다.
1. OS 스케줄러를 이용한 배치 프로그램 실행
- 한 머신 내부에서 스케줄러를 통해 Batch 프로그램을 실행한다
- 리눅스 crontab 등
- 실행 결과를 log로 남겨 확인한다.
2. Quartz 스케줄러를 이용
- Quartz 프레임워크와 + Spring Batch를 같이 사용한다.
- 어플리케이션 내부에서 스케줄링하므로 Batch 실행이 빠르다.
- 스케줄링 데이터가 DB에 저장되어 Admin을 따로 만들어야 한다.
3. Jenkins 사용
- Master Node에서 Slave Node로 명령을 전달해 배치 프로그램을 실행시킨다.
- 젠킨스에서 지원하는 스케줄링 기능을 통해 배치 프로그램을 실행시킬 수 있다.
- 젠킨스 Admin에서 실행 결과를 볼 수 있다. (별도의 admin을 만들 필요가 없다)
4. Spring Could Data Flow 사용
- Kubernetes 클러스트를 구축해야 한다.
- Admin이 제공되고, 잡의 실행을 연결할 수 있는 다양한 기능 제공
- 젠킨스보다 좀 더 진화된 방식으로 잡을 조율할 수 있다.
데이터 읽고, 처리하고, 쓰기
Chunk 기반의 Job 예제 코드를 작성해보자.
먼저 사용할 테이블을 다음과 같이 생성한다.
create Table `plain_text` (
    `id` int(11) NOT NULL AUTO_INCREMENT,
    `text` varchar(100) COLLATE utf8mb4_unicode_ci NOT NULL,
    PRIMARY KEY (`id`)
) ENGINE=InnoDB AUTO_INCREMENT=8 DEFAULT CHARSET=utf8mb4 COLLATE=utf8mb4_unicode_ci
테스트를 위해 다음과 같은 데이터를 저장해둔다.

엔티티와 레포지토리를 작성하자.
@Entity
@Getter
@Setter
@DynamicUpdate
@Table(name = "plain_text")
public class PlainText {

   @Id
   @GeneratedValue(strategy = GenerationType.IDENTITY)
   private Integer id;

   @Column(nullable = false)
   private String text;
}
public interface PlainTextRepository extends JpaRepository<PlainText, Integer> {
   Page<PlainText> findBy(Pageable pageable);
}
Pageable을 통해서 페이지의 사이즈 만큼 데이터를 읽어내도록 한다.
ItemReader, ItemProcessor, ItemWriter를 사용하는 예제 코드를 다음과 같이 작성해보자.
@Configuration
@RequiredArgsConstructor
public class PlainTextJobConfig {

   private final JobBuilderFactory jobBuilderFactory;
   private final StepBuilderFactory stepBuilderFactory;
   private final PlainTextRepository plainTextRepository;

   @Bean("plainTextJob")
   public Job plainTextJob(Step plainTextStep) {
      return jobBuilderFactory.get("plainTextJob")
         .incrementer(new RunIdIncrementer())
         .start(plainTextStep)
         .build();
   }

   @JobScope
   @Bean("plainTextStep")
   public Step plainTextStep(ItemReader<PlainText> plainTextReader,
      ItemProcessor<PlainText, String> plainTextProcessor, ItemWriter<String> plainTextWriter) {
      return stepBuilderFactory.get("plainTextStep")
         .<PlainText, String>chunk(5)
         .reader(plainTextReader)
         .processor(plainTextProcessor)
         .writer(plainTextWriter)
         .build();
   }

   @StepScope
   @Bean
   public RepositoryItemReader<PlainText> plainTextReader() {
      return new RepositoryItemReaderBuilder<PlainText>()
         .name("plainTextReader")
         .repository(plainTextRepository)
         .methodName("findBy")
         .pageSize(5)
         .arguments(List.of())
         .sorts(Collections.singletonMap("id", Sort.Direction.DESC))
         .build();
   }

   @Bean
   @StepScope
   public ItemProcessor<PlainText, String> plainTextProcessor() {
      return item -> "processed " + item.getText();
   }

   @Bean
   @StepScope
   public ItemWriter<String> plainTextWriter() {
      return items -> {
         items.forEach(System.out::println);
         System.out.println("=== chunk is finished");
      };
   }
}
다음과 같이 로직은 간단하다.
읽고 -> 프로세스하고 -> 써준다.
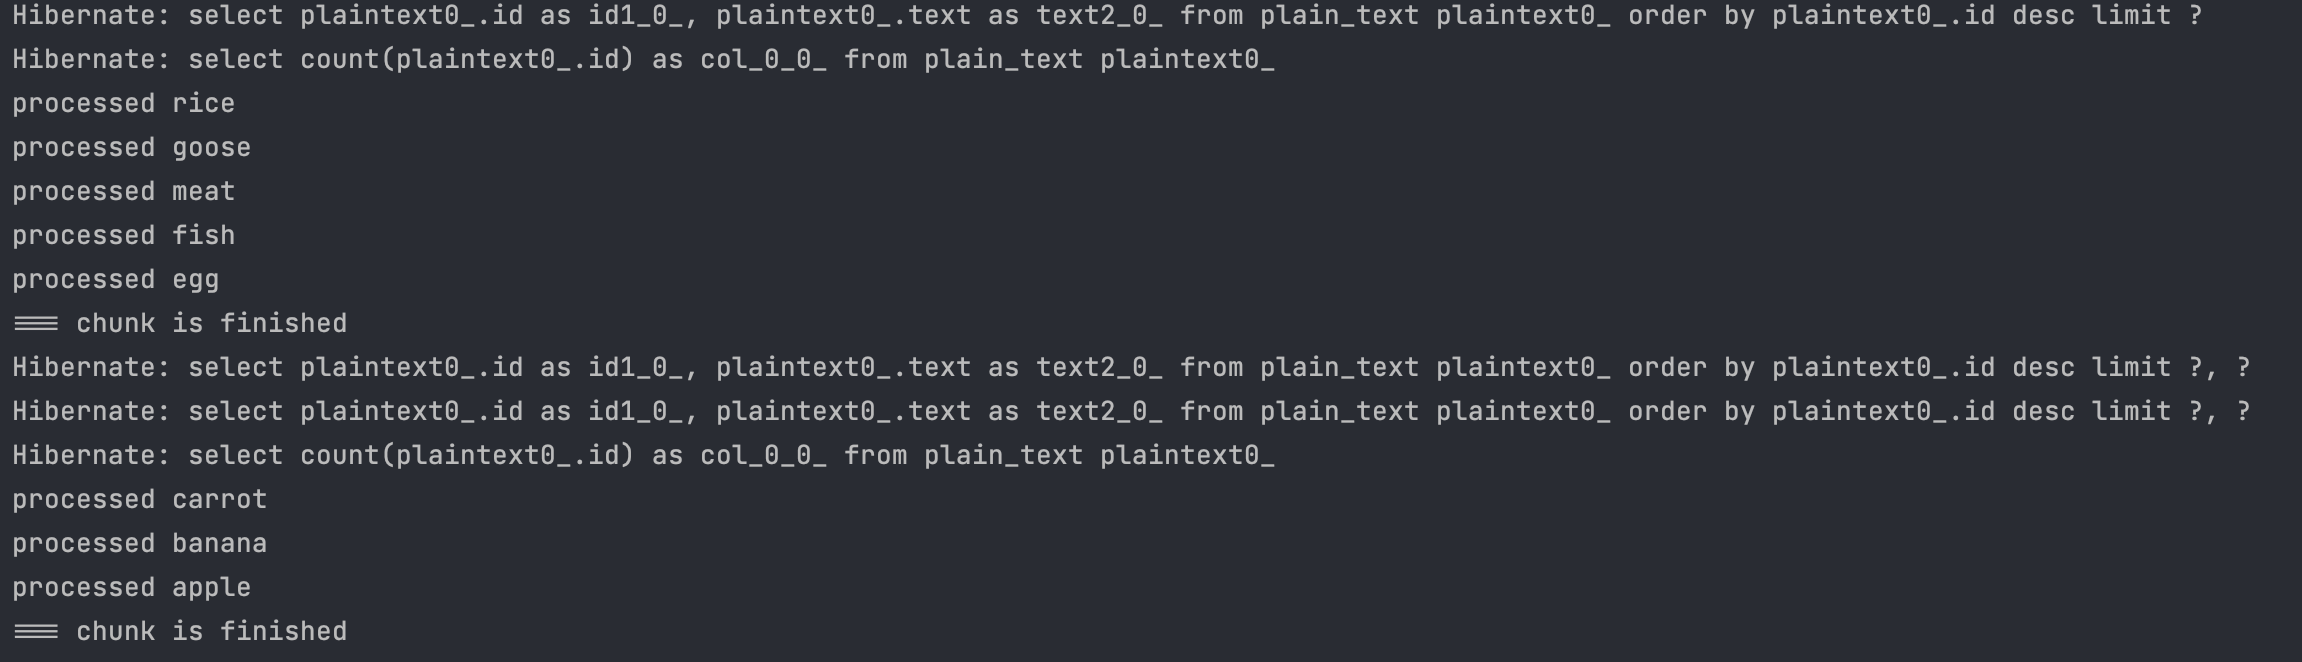
chunk size를 5로 설정했기 때문에 5개씩 나눠서 가져오고 처리했다.
또한 sort 값을 주었기 때문에 역순으로 5개를 읽고 프로세스 한 것을 볼 수 있다.
간단한 배치 테스트 예제 코드
테스트 환경에서 Job을 실행하기 위해서는 @SpringBatchTest 애노테이션을 사용해야 한다.
먼저 h2 DB를 사용하도록 gradle 의존성을 추가한다.
testRuntimeOnly 'com.h2database:h2'
yml 파일 설정을 다음과 같이 작성한다.
---
spring:
  config:
    activate:
      on-profile: test
  jpa:
    database: h2
테스트시 사용할 config 파일을 작성한다.
@Configuration
@EnableBatchProcessing
@EnableAutoConfiguration
public class BatchTestConfig {

}
본격적인 테스트 클래스를 작성해보자.
클래스 레벨에서 필요한 어노테이션들은 다음과 같다.
@SpringBatchTest
@SpringBootTest
@ExtendWith(SpringExtension.class)
@ActiveProfiles("test")
@ContextConfiguration(classes = {BatchTestConfig.class, HelloJobConfig.class})
class HelloJobConfigTest {
	//..
Batch Job은 JobLauncherTestUtils를 통해 테스트할 수 있다. 이때 JobLauncherTestUtils의 Job 설정을 별도로 해주지 않으면 스프링 컨텍스트 내의 모든 Job들을 가져오면서 에러가 발생한다. 현재 테스트 클래스에서는 이를 방지하고 HelloJobConfig.class 로 ContextConfiguration을 해준 것이다.
@Autowired
private JobLauncherTestUtils jobLauncherTestUtils;
이후 Job의 성공 테스트 코드는 다음과 같이 작성한다.
@Test
public void success() throws Exception {
   JobExecution execution = jobLauncherTestUtils.launchJob();
   Assertions.assertEquals(execution.getExitStatus(), ExitStatus.COMPLETED);
}
Job을 실행했을 때 정상적으로 수행되고 완료되는지를 검증하는 테스트 코드이다.
참고 자료
- 패스트캠퍼스: 한 번에 끝내는 Spring 완.전.판 초격차 패키지 Online.
'Lecture' 카테고리의 다른 글
| 스프링 배치 병렬처리, mock과 static mock, AssertFile을 이용한 배치 로직 테스트 (0) | 2023.07.12 |
|---|---|
| 스프링 배치 Validator, listener, FlatFileItemReader 및 Writer를 사용하여 간단한 text 변환 작업을 구현해보자 (0) | 2023.07.12 |
| Spring 배치 사용 이유와 기본 아키텍처에 대해 알아보자 (0) | 2023.07.11 |
| 선착순 이벤트 시스템에서 발생가능한 동시성 문제와 해결 방안 탐구(redis, kafka) (0) | 2023.07.11 |
| 동시성 이슈 사례와 해결 방안 탐구 (Synchronized, database, redis) (0) | 2023.07.11 |


